
Dial Puzzle
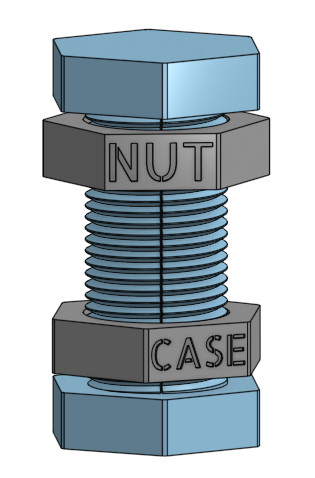
Nutcase Puzzle
For as long as I can remember I have been obsessed with puzzles. From jigsaw to Rubik's cubes, from sudoku to mechanical puzzles, and from from logic puzzles to math puzzles. It took me a while to realize that not only could I solve these puzzles but I could make my own too. So I sat down and thought and thought and sketched to come up with an amazing puzzle idea. And nothing came. So I did some research and have been finding many new puzzles that I never knew existed. Right now my focus is on mechanical puzzles. So I decided that before I can make my own unique puzzles I would need to learn by recreating existing puzzles.
Growing up in Japan I would always find these metal Hanayama puzzles on display to try out in the toy stores. Most of them were mixed up or missing parts but I was interested in trying and solve them nonetheless. So I looked back to Hanayama puzzles as a starting place for recreating puzzles. One that caught my eye was Nutcase.
Nutcase caught my eye because I had been experimenting with designing threaded parts and printing them. The picture to the right is an prototype I made to test the capabilities of my printer to print threads. And I was very impressed by how well it turned out.

Threaded Bolt Prototype
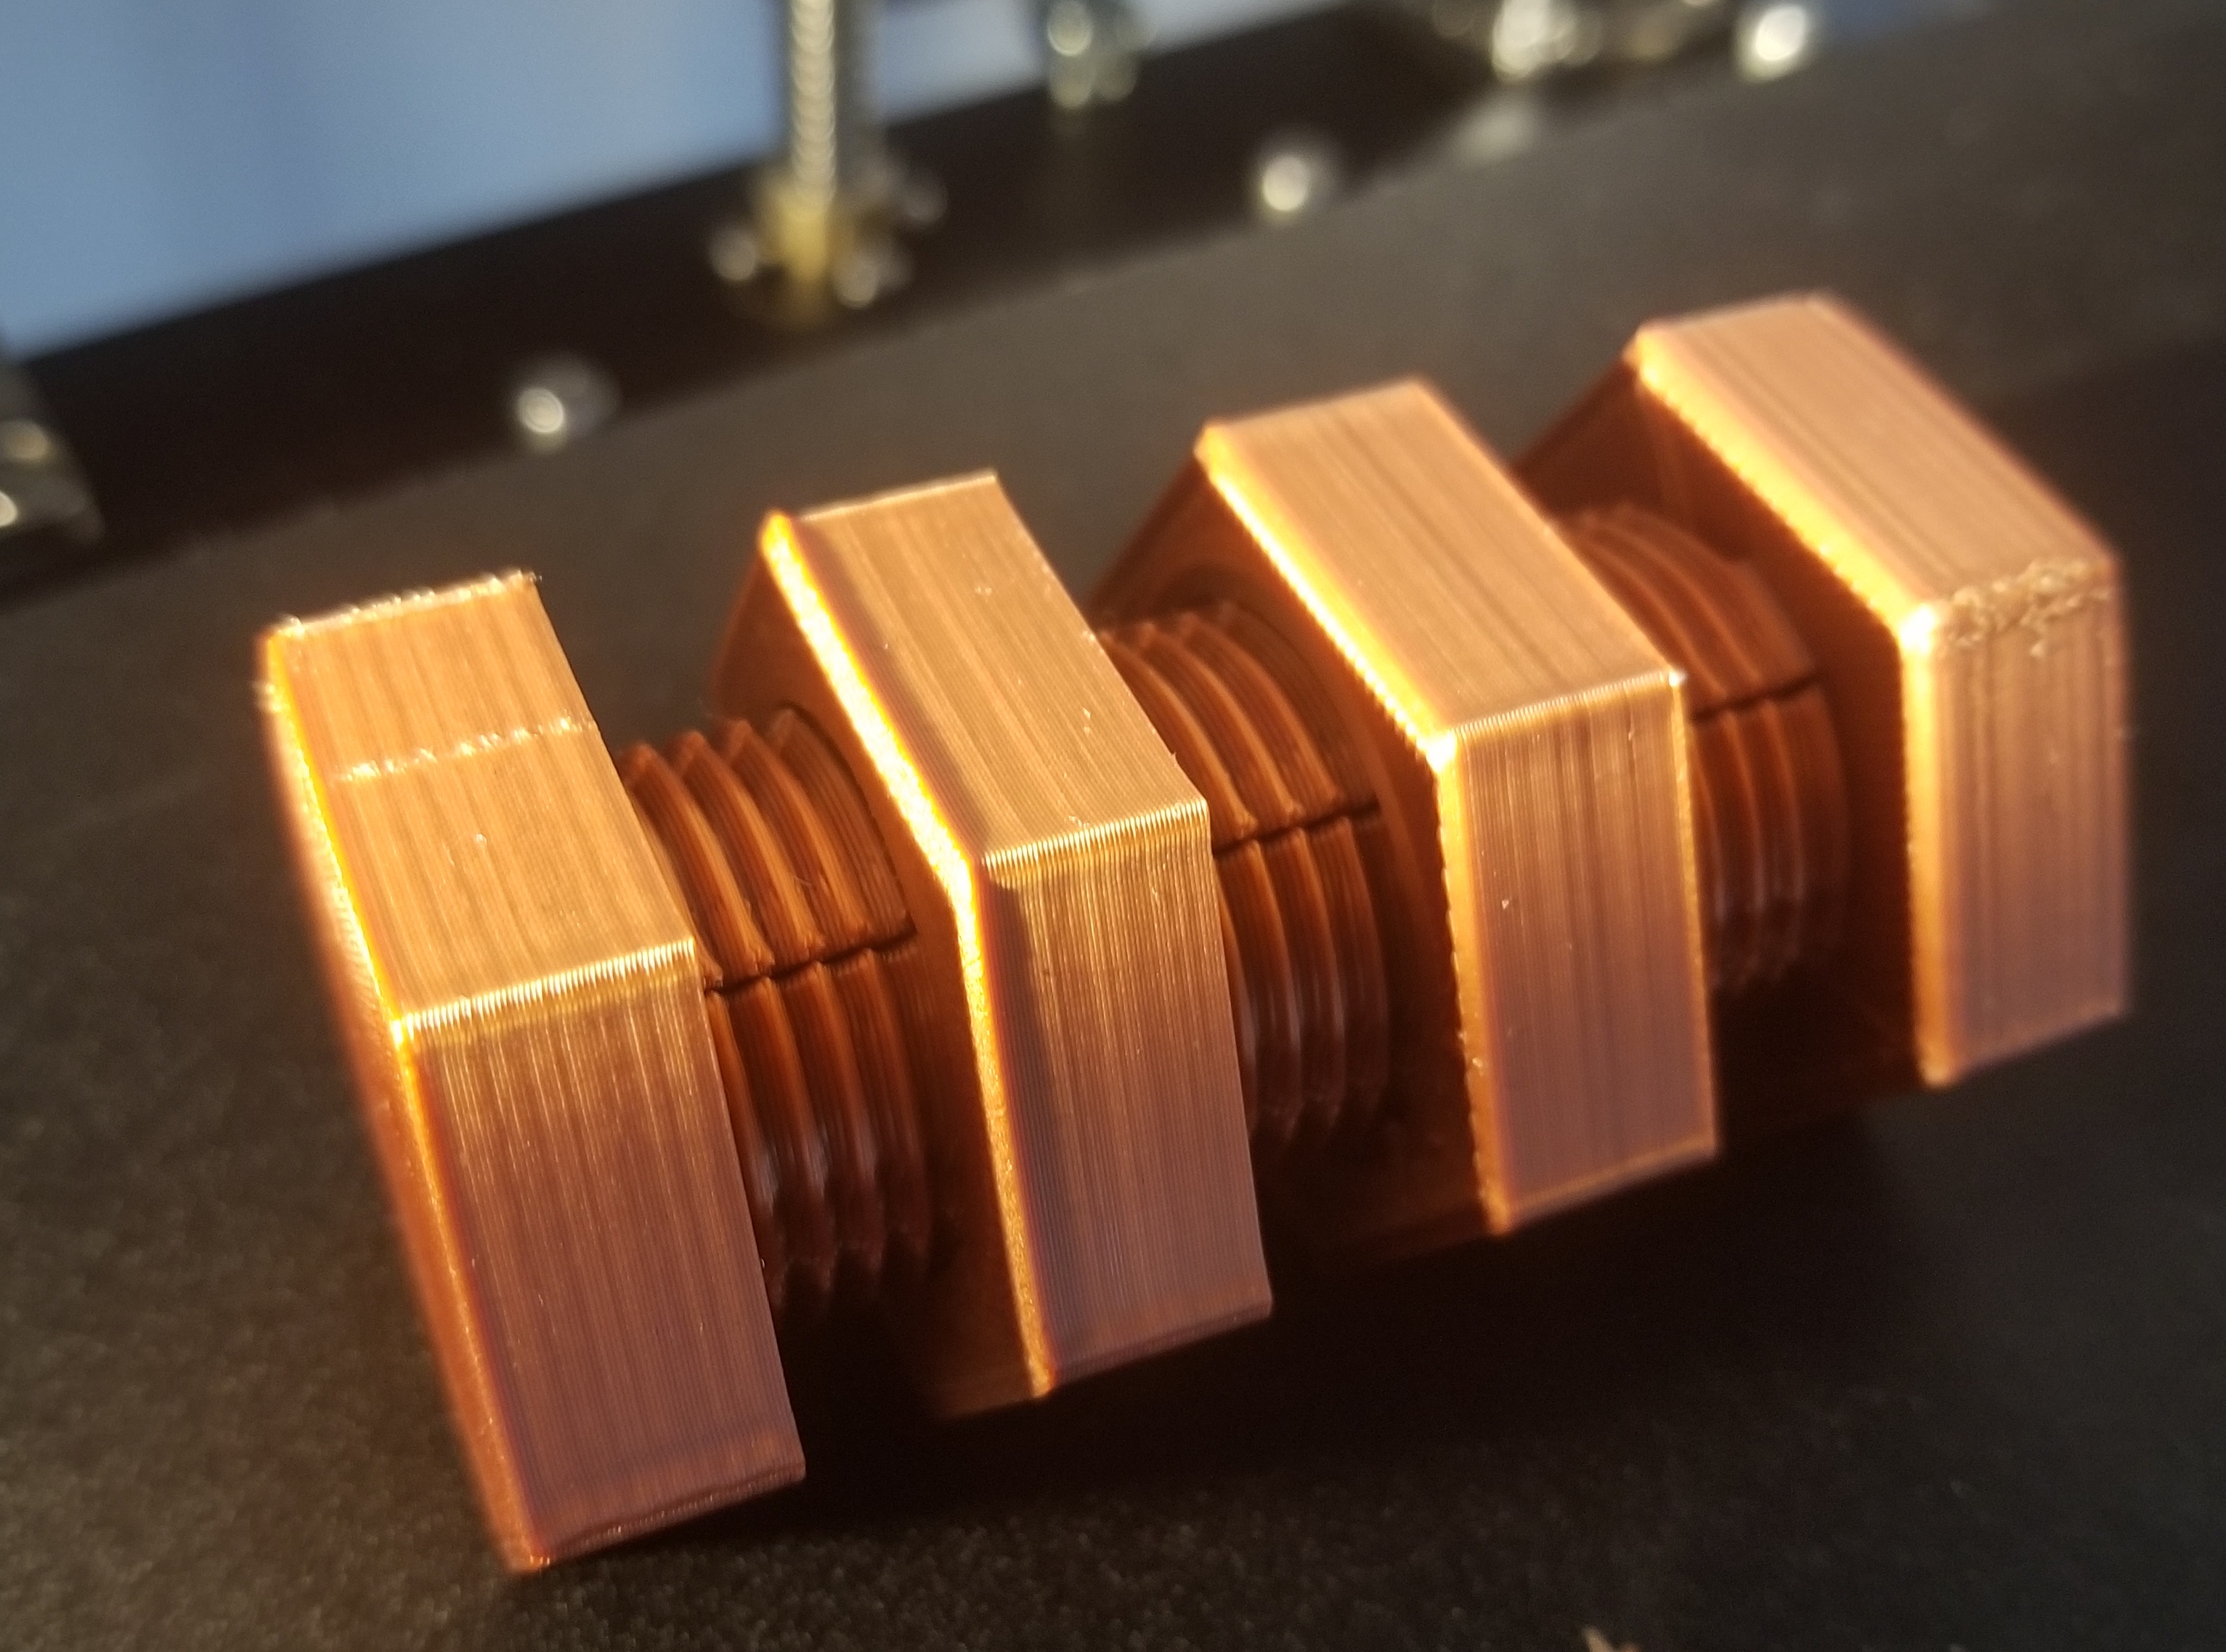
3D Printed Nutcase Prototype
Designing the nutcase pushed my method of modelling threading to another level. Without spoiling how this puzzle works too much I had to be able to create a thread that meshes, but also has the necessary features for the puzzle to work. A more detailed image of the model is to the right but it will spoil the solution to the puzzle. So click the picture to reveal it at your own risk.
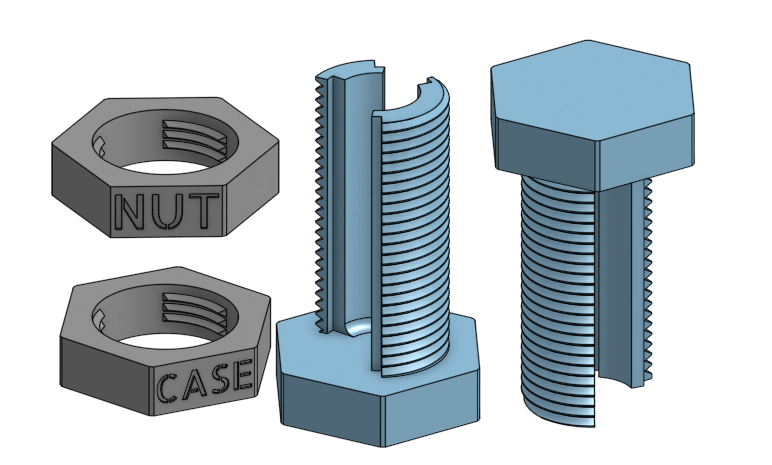
Spoiler: Click to Reveal
SPOILER: CAD Model of Nutcase Opened Up
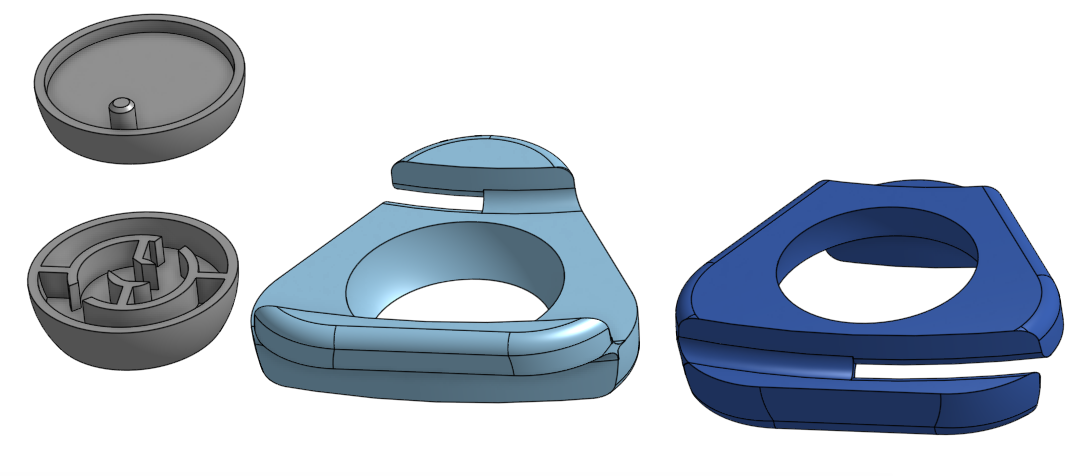
Another Hanayama puzzle that caught my eye was the Dial puzzle. This was mostly because of the unique geometries and movement of the puzzle. This one wasn't a direct copy of the original as I modified the center pieces slightly.
The biggest challenge for this puzzle was creating the outer case pieces and the geometry of them. It took me a while to even wrap my head around how it works (as I don't actually have physical versions of these puzzles and have to base them off of pictures). Once I figured that out coming up with a method to design it in CAD was another challenge. I ended up using a mixture of revolving, filleting, and combining shapes to make it work. The solution to this puzzle is easier than Nutcase, but I found that the puzzle of designing it was the most fun part of the project.
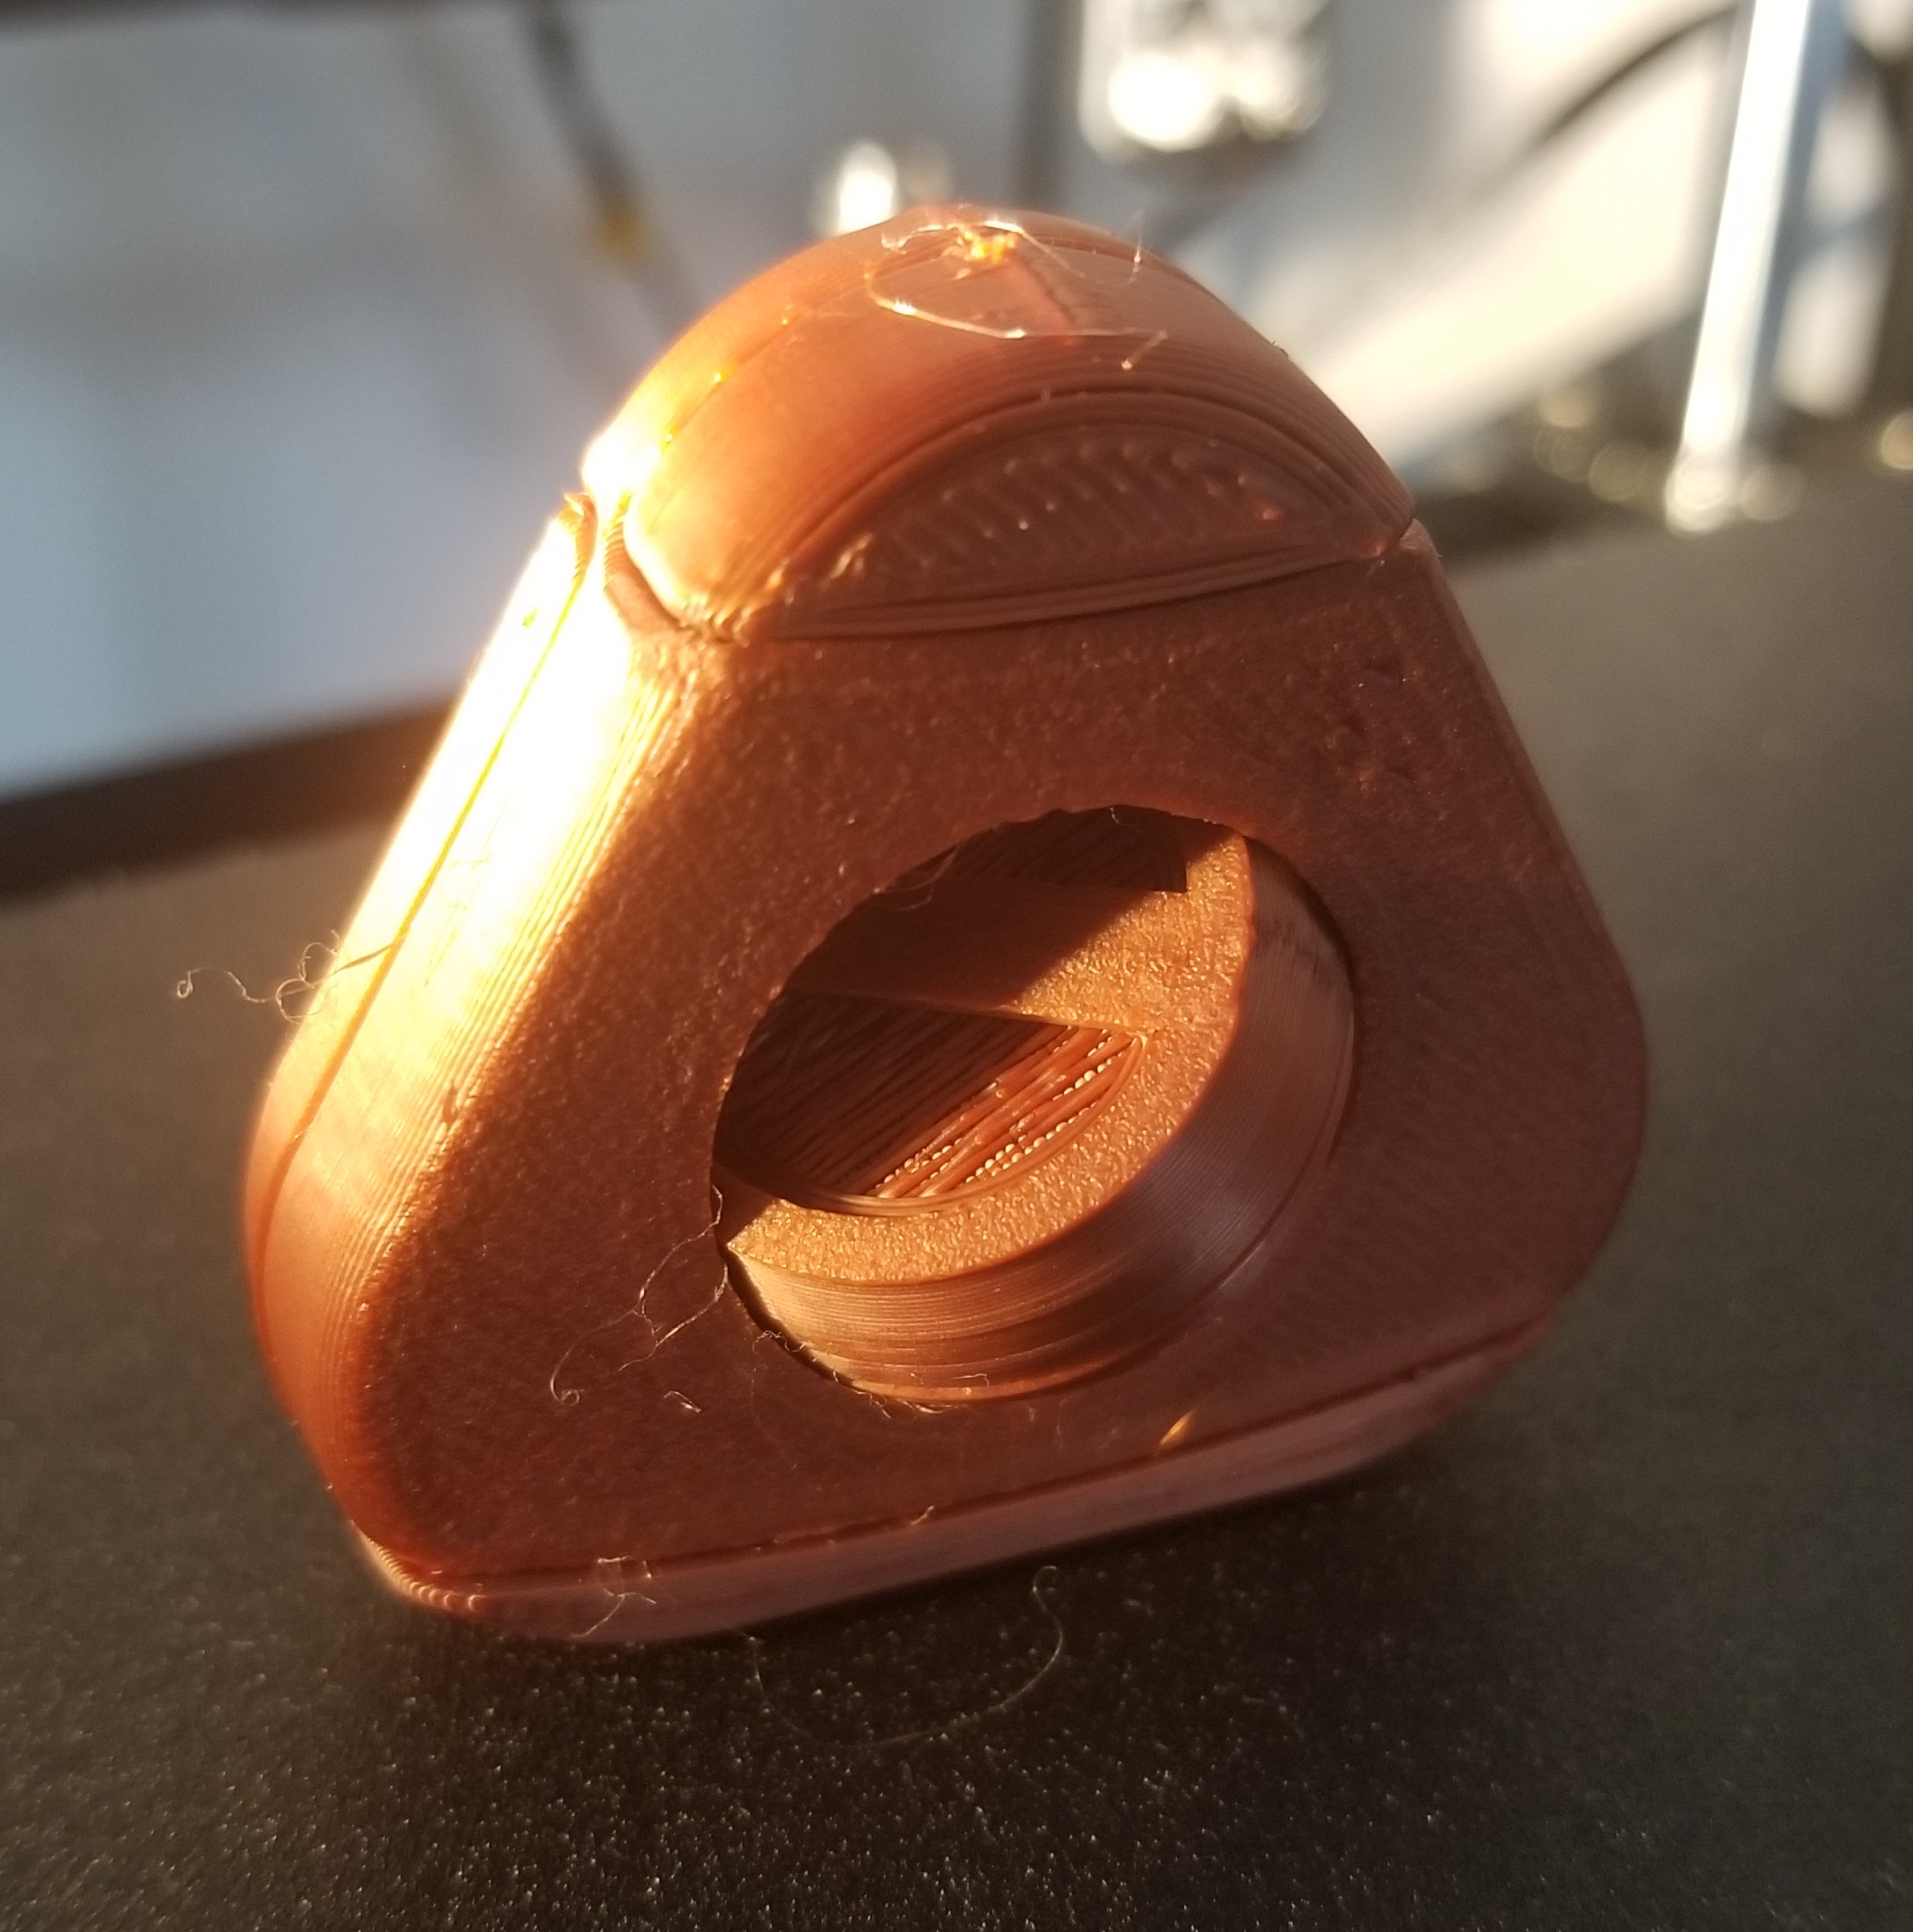
3D Printed Dial Puzzle
Spoiler: Click to Reveal
SPOILER: Render of Dial Puzzle Opened Up
My large project that I am working on is a sequential puzzle box. This is a bigger project as it has multiple puzzles that need to work with each other in the form of a box. As I have been learning new ideas for puzzles I have been picking and choosing some to put into the puzzle box. Curently I have made two of the walls and the idea for the bottom of the box. This project will probably be start and stop as I learn more and come back to it.
During the design of the box I decided to test design strategies and good workflow habits for CAD design.
The biggest thing I have been doing is optimizing the features and modifications I use when designing. Sometimes the first set of features to use such as sketch, extrude, fillet aren't the best order to do things. So I have been experimenting with making the most of every feature that I make. Along with this I have been renaming each feature to allow someone else to understand the process, and to make it more understandable to me at a later date to understand why I made the choices I did.
Another design workflow choice I have been using is to design the parts like writing code. Now you might be thinking, "What does coding have to with CAD design?" When writing code it is usually a good idea to define your parameters as variables at the beginning of your code, and then reference them later. I have been doing the same with this project. I set the various dimensioning variables such as wall width, tolerance for sliding, wall depth, slider dimensions and so on at the beginning of the feature tree. That way if, for example, after prototyping I realize that I need a 0.4mm tolerance instead of the 0.2mm tolerance I can change the value of the variable and the entire design updates. This also means that each sketch I make has to take into account these variables. I have found that some of the same considerations you take in responsive web design (which I have been trying to do in this website) are the same things you need to think about when dimensioning your sketches in CAD software.
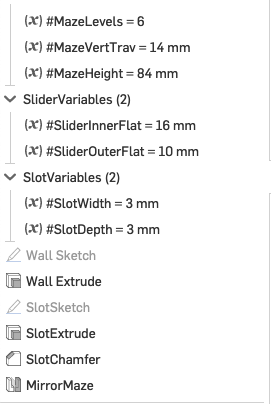
Feature Tree with Parameters
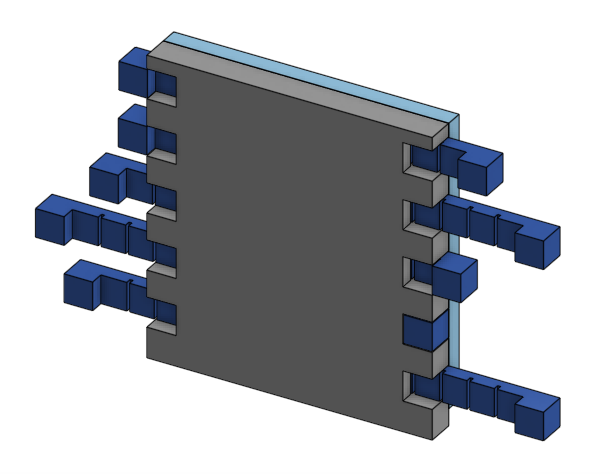
Cryptex Wall
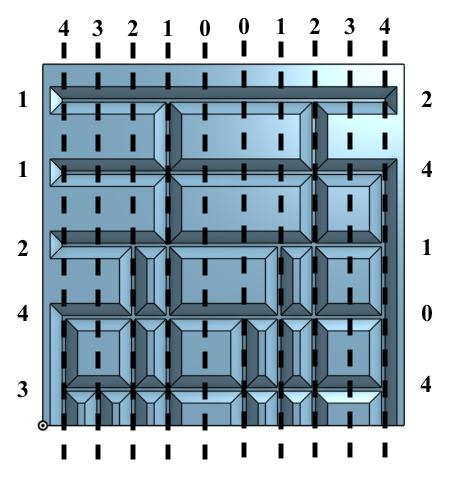
Variable Based Cryptex Design
To bring the variable based dimensions further I implemented a more complex version of this into a cryptex part of the puzzle box. This next part is a bit of a spoiler so be warned. The concept for this wall is to slide multiple sliders (10 of them) out to different positions that are that will allow the wall to slide upwards. I wanted to make the design for this customizable to any 10 digit code. Each slider can be in one of five positions. I set a variable to each one of the sliders to be a number from 0-4. These varaibales were then used to drive the dimensions that determined the distance of the vertical furrows to essentially change the answer to the puzzle. This was kind of difficult due to the way the chamfers define their locations and the need for it to update the entire maze automatically. In the end I just had to break down the steps so that as the model updates they will work correctly in sequence.